Readers, I bought a bread machine. From eBay, because everywhere that sells them new had run out, obviously. It’s a Lakeland Plus Breadmaker model, and will be the subject of a separate post later. But in short, I love it.
However … my husband said the bread was all very nice, but he wished it could make sourdough. So I started a starter, which I have named Brenda. She’s just equal parts of flour and water, refreshed every day, and alternating between rye and white flours. And I deemed her ready for work on Friday. Now, I’ve never made sourdough bread before, although I have had several goes at a starter – turns out the simpler, the better, apparently.
I have a friend, Piers, who is a professional baker (usually, he’s not baking during the lockdown), and I found this recipe in his mailing list Not Loafing Around. It was very complicated – far too complicated for me – so I simplified it a bit, and this is what I did.
And here’s how I made my loaf, with all due respect to Piers.
You will need:
100g starter
200g organic white flour (or any bread flour)
160g warm water
And a big mixing bowl.
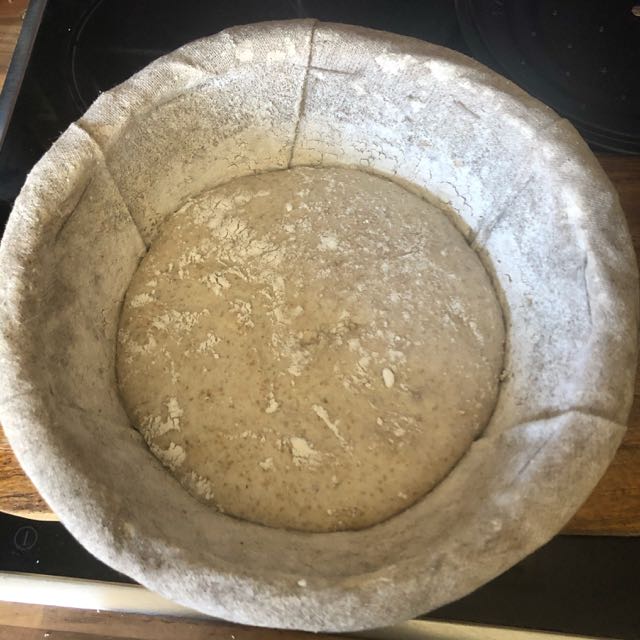 Just for the record, also used a plastic dough scraper, and a proving basket which Piers kindly gave me a year or two ago. Here it is, containing Brenda on one of her final rises. I don’t yet have a dough whisk, but one is on order!
The night before you want to make the bread, take 100g of your starter, and mix with the flour and water to make a smooth batter. You don’t need to worry too much about lumps, but smoother is better. Cover this starter (I used a tupperware type box) and leave it to its own devices overnight.
Not to confuse you, but I had about 600 grams of starter, so I completely skipped that stage, but it’s there for reference.
Mixing and ‘kneading’
360g starter (keep the remainder for your next loaf)
385g organic white flour
250g warm water
12g salt
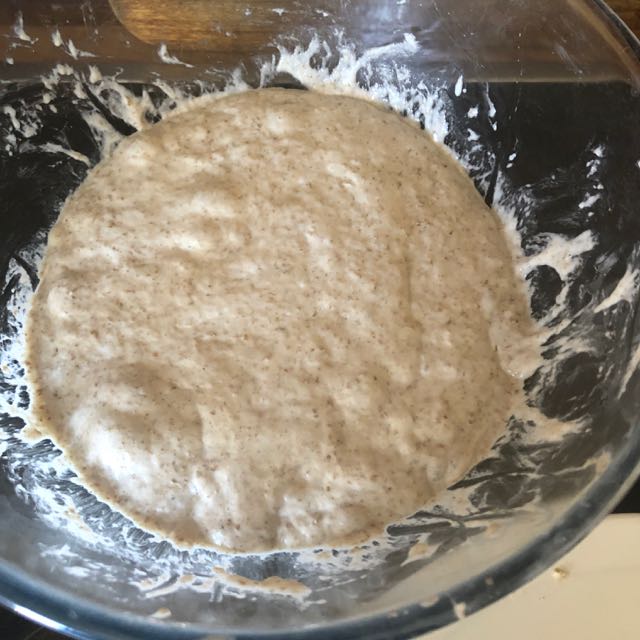 I did this first stage on Friday night: throw all the ingredients into your mixing bowl. Just bung it all in and mix everything together; everything should be mixed, but it’s not going to look like lovely elastic dough. It’s also going to look wet. I just put a plate over the bowl to cover it. And then on Saturday, I just used my dough scraper to turn and fold the dough in the bowl every hour or two, or when I remembered. Seemed quite happy, and was bubbling away. I started this at 06:30(!) and carried on till about .. 13:00, I guess.
Now, the fun part
Spread a teaspoonful of oil (olive, rapeseed, sunflower) onto the worktop and turn the dough out onto it. Pat it into a rough disc. Fold the furthest part of the dough to the middle, then the nearest, give the dough a quarter turn (use your scraper to lift it if you need to) and repeat. Return the dough to the bowl with the smooth side uppermost. It is incredibly sticky. The whole of that side of the kitchen, including myself, had dough on it. If you don’t have a scraper, you might struggle a bit – a palette knife might help.
Put it back in the bowl and cover it again – this is what’s called the ‘bulk ferment’ stage. I put it on the living room window sill, where it’s warm, till about 16:00, and left it alone – it rose beautifully.
Bulk ferment and folding
Scatter the tiniest amount of flour possible on your worktop. Dust your hands with a bit more flour and turn your dough out onto the bench. Make a fold and turn the dough over so the seam side is down. Now, reach over to the far side of the dough and cup your hands around it and slide it towards you. The near side should ‘catch’ on the worktop and get pulled under, putting some tension into the skin. You don’t have to slide it very far to get this. Now turn the dough slightly and do it again. (I did this with my scraper) Work the dough into a rough ball, dust it with a little flour and cover it loosely with some cling film, he says. But the dough stuck to the cling film, so I scraped it all off, re-did that stage, and put her back in the bowl with the plate on top. She didn’t seem to mind.
Now leave it the dough to ‘relax’ for 20 minutes.
Shaping
Lots you can do for that, but I wanted a traditional round loaf.
Make a ball by doing the pre-shape again, but this time keep repeating the turn and drag until things are feeling really tight. Keep your hands well floured, you don’t want the dough to stick to you and tear as you get unstuck.
Proving
If you don’t have a proving basket, I’m sure you could just do this stage with the old bowl and plate method. But I’m lucky enough to have one, so I used it.
The loaf is fully proved when the dent you leave with your thumb doesn’t spring back immediately but returns slowly. I left mine for two hours.
Baking
I did mine in a cast iron casserole. I floured it well, but the bread still stuck round the edges; ‘im indoors managed to extricate it without too much damage. I shall try cornflour next time or semolina.
Heat the oven to 240ºC, and when it’s hot, tip your loaf into the middle of the casserole. Slash the bread. Random short slashes can work well here, you’re less likely to bash the blade into the walls of the casserole and make whoever sharpens your knives unhappy. Put the lid on, set a 1 hour timer and into the oven goes the bread in its cast iron armour. Give it 10 minutes before turning the oven down to 220℃. Take the lid off with 10 minutes to go.
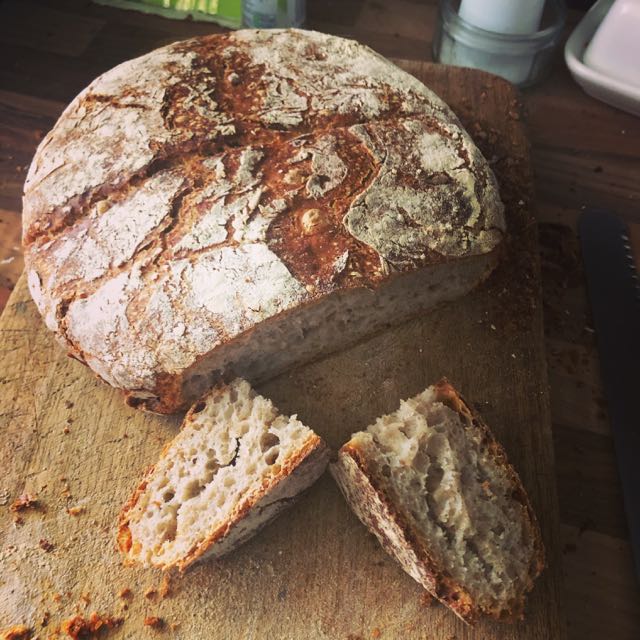
When the time is up, tip it out of the casserole and leave it to cool on a rack. Take a bit of time to listen to the crust crackling as it cools and different parts of the loaf shrink at different rates, causing the crust to break and the bread to sing. Let it cool at least to blood heat before you are tempted to slice it. Cooling actually completes the cooking process as the crumb firms up and steam condenses and is reabsorbed by the structure of the bread.
And there you are. it’s a lot of faff, and I wouldn’t do it everyday, but it’s worth it. I urge you to read Piers’ post at http://tinyletter.com/LoaferyBread/letters/week-15-of-loafing-around-what-s-in-the-loaf, as there is masses more information than I have written here, and it’s all useful. I’m going to try a rye loaf next weekend 🙂
Happy sourdoughing!
Love from me and Brenda xx